Posted by
ANTO
comments (0)

Random access memory, or RAM as it is popularly known is one of the most integral components of a computer system or electronic device. RAM is mostly used in computers, but even devices like printers, mobile phones and the like use it. It is a volatile type of memory and involves continuous exchange of data. Data that needs to be processed and utilized quickly is stored in the RAM modules. With respect to computers, the first RAM modules were introduced in the 1950′s and have evolved to possess much greater capacities over the years. There are various types of RAM modules like SDRAM, DDR SDRAM, DDR2 RAM and the newest, DDR3 SDRAM. All of these modules differ with respect to the frequency with which data can be written and accessed. Needless to say, their capacities have increased as well.
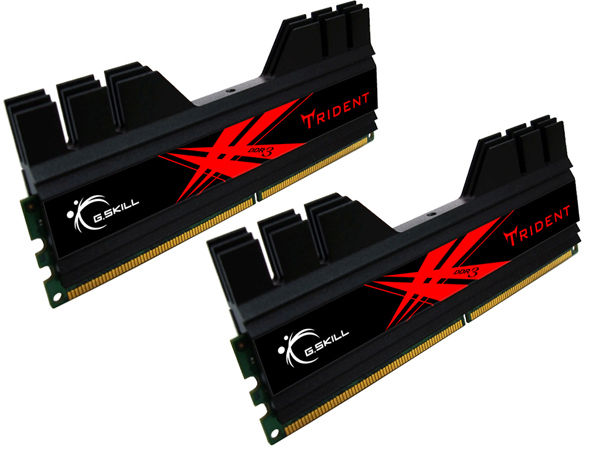
SDRAM stands for single data rate random-access memory and DDR SDRAM stands for double data rate synchronous dynamic random-access memory. As the name suggests, DDR was an evolution of SDRAM and allowed higher data transfer rates and at a certain clock frequency had double the data bandwidth of SDRAM. Furthermore, newer evolutions of RAM modules operated at lower voltages and were thus more power efficient. Like most such components, RAM modules are not backward or forward compatible.
SDRAM was available in clock frequencies ranging from 66-133Mhz, DDR SDRAM was available in frequencies ranging from 100-200Mhz and operated at 2.5v, DDR2 SDRAM is available in frequencies ranging from 200-533MHz, operates at 1.8v and DDR3 SDRAM is available in frequencies ranging from 400-1066MHz and operates at 1.6v.
Along with these classifications, RAM modules are available in low and high density types. Not all motherboards support high density RAM modules, most support low density RAM modules. Contrary to what the name suggests, “high density” RAM modules do not provide any performance gains, and in fact might perform worse on most motherboards that support only low density RAM modules. For example, a 1GB low and high density RAM module consists of 8 chips of 512Mb on each side for a total of 16 chips. These are arranged in the form of (512Mb x 16)/8 bits which gives 1024Mb or 1GB. In low density modules, each chip is organized with 64M bits with a data width of 8 bits, this is commonly expressed as 64M x 8 configuration. In high density modules, the same arrangement is seen, but each chip is organized with 128M bits with a data width of 4 bits.It is expressed as 128M x 4 configuration and is called high density.

RAM modules are in the form of DIMM’s or dual inline memory modules. It is a series of integrated memory circuits on a printed circuit board. These circuit boards with the memory IC’s are collectively called RAM sticks. Every iteration of RAM modules ranging from SDRAM to DDR3 SDRAM are connected to motherboard DIMM slots and are recognized by different number of pins on one end. For example, DDR and DDR2 SDRAM are available in 200-pin DIMM configurations and DDR3 SDRAM is available in 240-pin DIMM configuration. For smaller devices like laptop computers, mini ATX computers, high end printers and networking devices, RAM modules are available in SO-DIMM type. SO-DIMM stands for small outline dual in-line memory module. Similar to usual DIMM’s, SO-DIMM’s also come with different pin configurations.
Posted by
ANTO
comments (0)
Repair checklist:

Checklist for computer repair.
Identify the failed part.
Disconnect the power cord.
Ground yourself.
Open the case.
Disconnect any cables connected to the component.
Remove failed part by either removing the retaining screw or latch.
Set the part aside.
ENSURE you are grounded.
Remove new part from Anti-Static bag.
Carefully insert the new component into slot or bay.
Secure the part, be careful with screws that go through the component boartorque will crack the board.
Reconnect the cables for the component if there are any.
Check your work,
check the adjacent cards, drives, etc. make sure youinadvertently bump something loose.
Put case cover back on, this will preclude you from touching any componentsystem is powered up.
Reconnect any external cables you disconnected.
Power up the system.
Watch for system startup screen, if you do not get a screen with in twoseconds power the system down, disconnect the power cord.
Posted by
ANTO
comments (0)
Apple Macintosh

Although a great improvement over punch cards, some computer scientists saw
limitations in a computer with only a keyboard for input and text for output. It was fine
for researchers and computer experts to interact with the machine through obscure
commands and oblique text messages, but if the computer was going into every home, it
needed to interact with users in a different way.
In the early 1970s, researchers at Xerox developed a series of computers that
communicated with the user through pictures, not just words. The culmination of their
early efforts was the Xerox Star. It had “windows,” a “mouse,” and many other elements
you would recognize today. Eventually this method of computer use—mostly visual, with
little text—would be called a graphical user interface (or GUI), and every computer
would have one. Unfortunately for the executives at Xerox, they proved better at funding
interesting projects than at marketing the results.
Steve Jobs, the president of Apple Computers, toured the Xerox research facility in 1979,
having traded some Apple stock for Xerox stock. He’d been told about this new interface
and wanted to see it. He left impressed, and decided that Apple’s new computer, the
“Apple Lisa,” would be the first mass-produced computer with a graphical user interface.
Many of the Xerox researchers would soon be working at Apple.
Not many Apple Lisas were sold. It was an expensive computer, costing $10,000 when it
debuted in 1983. But because Jobs was convinced that the GUI was the model for the
future, he tried again.
During the Super Bowl in 1984, Apple ran one of the most famous commercials in
history to introduce their next computer, the Apple Macintosh. Directed by Ridley Scott,
director of the movie Blade Runner, it depicted an Orwellian future of gray-clad workers
who mindlessly pay homage to a “Big Brother” figure on a huge video screen, until an
athletic woman in running clothes smashes the screen with a flying hammer. What this
had to do with the Macintosh was never clear, but the commercial was widely discussed
around office water coolers and was repeated on news programs. Soon everyone had
heard of the “Mac.”
The new computer was cheaper than the Lisa, but less powerful. As with the Lisa, it was
a slow seller at first, but the company stuck with it. There was no turning back to
text-based computers.


Posted by
ANTO
comments (2)
Removing/Installing a DIMM/RIMM
When removing a DIMM or a RIMM and using proper ESD prevention techniques, push down on
the DIMM retaining tabs that clasp over the DIMM. Be careful not to overextend the tabs when
pushing on them. If a plastic tab breaks, the only solution is to replace the motherboard. The
DIMM/RIMM lifts slightly out of the socket. Ensuring you are grounded to prevent ESD, lift the
module out of the socket once it is released. Figure 6.10 shows how to remove a DIMM/RIMM.

A DIMM/RIMM has one or more notches on the bottom where the gold or tin contacts are
located. The DIMM inserts into the memory socket only one way. The DIMM memory socket has
two tabs that align with the DIMM notches. Look at the DIMM and notice where the DIMM
notches are located. Look at the DIMM socket and notice where the tabs in the socket are located.
The DIMM will not insert into the memory socket unless it is oriented properly.
A DIMM/RIMM is inserted straight down into the socket, not at a tilt like the SIMM or a
SO-DIMM. Make sure the side tabs are pulled out before you insert the DIMM, and close the tabs
over the DIMM once it is firmly inserted into the socket. If the DIMM/RIMM does not go into the
slot easily, do not force it and check the notch or notches for correct alignment. However, once
the DIMM is aligned correctly into the slot, push the DIMM firmly into the slot and the tabs
should naturally close over the DIMM or on the sides of the DIMM. Figure 6.11 illustrates how
to insert a DIMM or a RIMM.

Posted by
ANTO
comments (0)
Network Ports
Network ports are used to connect a computer to other computers, including a network server.
Two different network adapters, Ethernet and Token Ring, are available, but most networks use
Ethernet ports. The ports on these adapters can be quite confusing because the connectors are
sometimes the same. A network cable inserts into the network port.
Ethernet adapters are the most common type of NIC (network interface card/controller). They
can have a BNC, an RJ-45, a 15-pin female D-shell connector, or a combination of these on the same
adapter. The BNC connector attaches to thin coax cable. The 15-pin D-shell connector connects to
thick coax cable. The RJ-45 connector connects to UTP (unshielded twisted-pair) cable and is the
most common Ethernet port used. The 15-pin female D-shell connector is confusing because this
connector is also used with game ports. The RJ-45 connector (the most common one) looks like a
phone jack, but it uses eight wires instead of four. Figure 1.25 shows examples of different Ethernet
adapter ports.

Posted by
ANTO
comments (0)

The IEEE 1394 standard is a serial technology developed by Apple Computer. Sometimes it is
known as FireWire or i.Link, which is a Sony trademark. IEEE 1394 ports have been more predominant
on Apple computers, but are now becoming a standard port on PCs. Windows and
Apple
operating systems support the IEEE 1394 standard. Many digital products now have an
integrated
IEEE 1394 port for connecting to a computer.
IEEE 1394 devices include camcorders,
cameras,
printers, storage devices, DVD players, CD-R drives, CD-RW
drives, tape drives, film
readers,
speakers, and scanners.
Speeds supported are 100, 200, 400, 800, 1200, 1600, and 3200Mbps. As many as 63 devices
(using cable lengths up to 14 feet) can be connected with FireWire. The IEEE 1394 standard supports
hot swapping (plugging and unplugging devices with the power on), plug and play,
and
powering
low-power devices. The cable has six wires—four for data and two for power.
Newer
IEEE
1394 standards support the use of RJ-45 and fiber connectors. Figure
1.22 shows FireWire
ports. Figure 1.23 shows three IEEE 1394 adapter ports.
Posted by
ANTO
comments (0)
- You can run System Restore from a command prompt
If Windows XP does not load properly, you can execute it from a command prompt with the
command %systemroot%\system32\restore\rstrui.exe. In Windows Vista/7 the
path is %systemroot%\system32\rstrui.exe.
- Adding Administrative Tools to the Start button
To add the administrative tools to the Start button’s All Programs option, right-click an empty
space on the Taskbar → Properties → Start Menu tab → Customize. In XP, select the Advanced
tab →use the Start menu items section’s vertical scroll bars to locate the System Administrative
Tools section → Display on the All Programs menu radio button → OK button twice. In Vista/7,
scroll to the System Administrative Tools section and select a radio button to put the tools either
on All Programs or on the Start menu.

Posted by
ANTO
comments (0)
CPU: Central Processing Unit or
Processor
Computer-Repair can help!
With out a processor you would not have a computer!
We have come a long way since the Commodore 64, Atari 400, T I 99, and the Tandy.
These were primary game systems, most used cartages for the games. I do remember
coding a word processor and a spread sheet program on my Atari for my college classes,
had to save it to a cassette tape recorder.
These all used a 8 bit
processor, most used one known as the 6502 processor.
When Intel introduced the 16 bit 8088/8086 processor in 1981 the PC revolution was on!
The IBM PC was very expensive, so the primary market was business. An IBM PC cost
as much as a new car!
With innovation comes imitation. A few short years after the IBM PC was introduced the
makers of circuit boards realized they could create a "clone" of the IBM PC main board.
Processor speed and computing capacity doubles with each new type of processor.
Take the original processors, they were 4 bit, you could get them in a calculator in the
'70's.
Then in the late '70's Motorola and Intel introduced the 8 bit.
1981 Intel introduced the 8086/8088, Motorola the 6800, these were 16 bit processors .
The Math Coprocessor is a separate chip
1983/84 Intel introduces the 80286, an increase in computing power and the introduction
of the Math Coprocessor in the same package as the processor, with a leap in clock speed
of the processor.
1987 Intel introduces the 80386, the first 32 bit processor. The increase in speed is
incredible, real time processing.
1989: Intel486™, a upgrade to the 80386, increase in speed and computing power.
1993: Intel introduces the Pentium® Processor, this would have been the 80586 but a
court order stopped the chain, a number can not be trade marked. (The new name of
Pentium continues today.) A quantum leap in speed and computing power.
1997: Intel introduces the Pentium® II Processor another increase in speed and
computing power. Approaching 1 gig hertz clock speed.
1999: Intel introduces the Pentium® III Processor, increase in clock speeds over 1 GHz
(gig hertz)
2000: Intel introduces the Pentium® 4 Processor clock speed over 2 GHz.
2001: Intel introduces the Itanium® Processor, first in a family of 64-bit products from
Intel, primarily for Servers.
2003: Intel introduces the Pentium® M Processor, primarily used in mobile technology.
2006: Intel introduces the
Core™2 Duo processor, 40% faster than the Pentium 4, uses
40% less power.
Posted by
ANTO
comments (0)
THE WORD PYROS MEANS "A person who has a compulsion to set fires".
Then ready to fire ourself with TIPS AND TRICKS.

Then ready to fire ourself with TIPS AND TRICKS.


